One (of many) great perks of Near Me Metrics™ is the ability to view data at any time for any set of locations. However, many still need monthly, weekly, and even daily reports. They help keep us on track, remind us to view our data, and allow us to identify trends over time.
Setting up reports from any dashboard can be done quickly, and we have put together this quick step-by-step guide to show you how.
Steps to set up a monthly report
After logging into your dbaPlatform account, select the Near Me Metric data dashboard you wish to view and set up a report. Once on the data dashboard, follow the steps below.
Pro-tip: The example below is of the Business Summary dashboard. This dashboard emulates the retired Monthly Reports that many dbaPlatform users are accustomed to receiving.

Tip: Consider who this report will be sent to when setting up your filters. What information will they need?
2. Once your filters are set, please save by selecting the blue refresh button.

CHECKPOINT
Your filters on your dashboard have been selected and saved. Now we are ready to set up the delivery of the report.
3. Select the dashboard actions by clicking the three vertical dots in the right-hand corner.

4. Select Schedule Delivery.

Tip: You can think of "schedule delivery" as the same as "schedule report."
5. A pop-up will appear on your screen with the report settings.
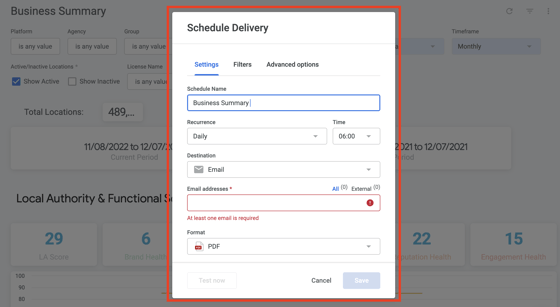
6. Fill out and select your report settings on this pop-up screen.
"Schedule Name" is the name that will appear on the report. Adjust this name to reflect how you would like it to appear in the platform and when sent.
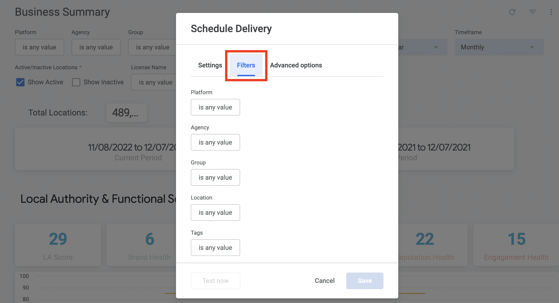
7. Confirm the data in your report by selecting Filters and reviewing the selections made.
8. Select Advanced Options to customize the delivery of your report.
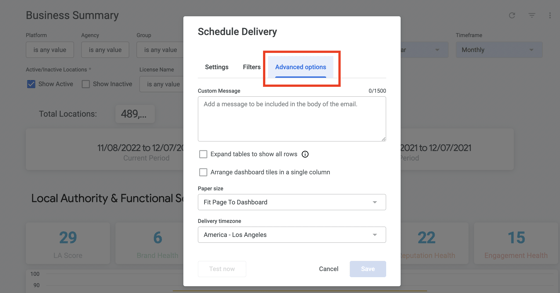
Pro-tip: Include a helpful, descriptive message, so users know exactly what report they are receiving.
9. Click Save to update and schedule your report.
You can always go back to test, edit or create new reports by selecting the Dashboard Actions located on every dashboard in the right-hand corner.
Congrats! You have successfully set up a report in Near Me Metrics™.