In This Article:
3.) Manual Set Up
4.) Conversion Window Settings
1.) Navigate to Set Up
- Open your Google Ads Account
- At the top, select "tools & settings"

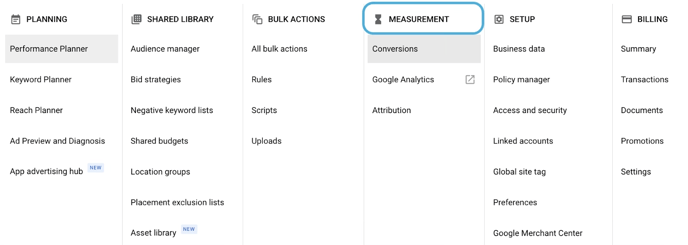
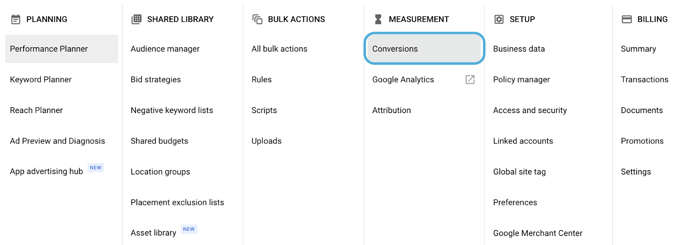
2.) Create a New Conversion
- Select "+ new conversion action"

- Select "website"
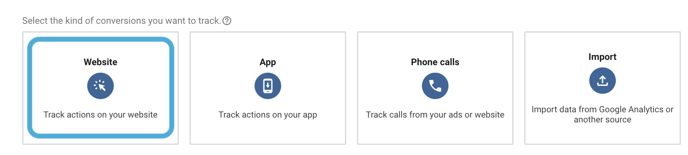
- Scan the URL for the website where you want to measure conversions
-1.png?width=688&name=unnamed%20(1)-1.png)
- Scroll to the bottom and select "add conversion action manually"
.png?width=688&name=unnamed%20(2).png)
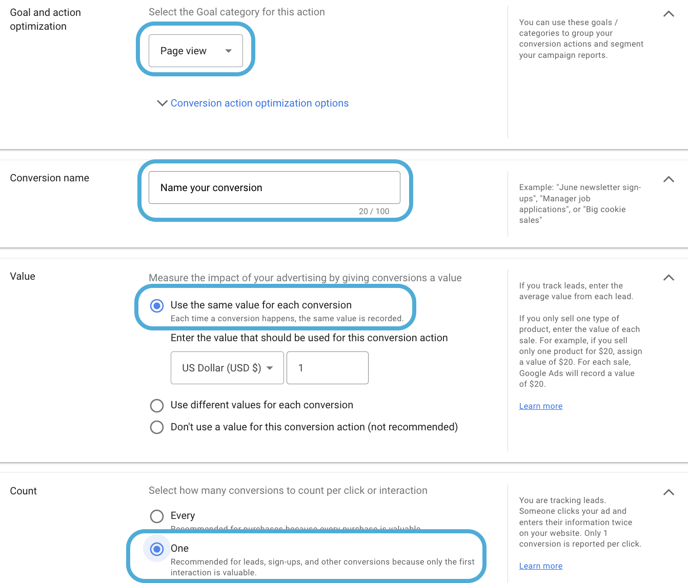
3.) Manual Set Up
- In the Goal and Optimization section, choose "page view"
- Name your conversion
- In the Value section, choose "Use the same value for each conversion" and enter one or more as its value
- In the Count section, select "one"
4.) Conversion Window Settings
At the bottom, ensure conversion window settings mirror the example.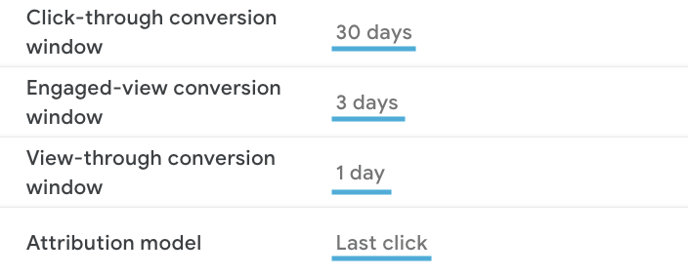
- Click-through conversion - 30 days
- Engaged-view conversion - 3 days
- View-through conversion - 1 day
- Attribution model - Last click
5.) Apply Your New Conversion
Follow on-screen instructions to apply your conversion tag.
- Global Site Tag
- Apply this tag to every single page on your website globally
Copy the tag below and paste it in between the <head></head> tags on every page of your website. You only need to install the global site tag once per account, even if you track multiple actions.
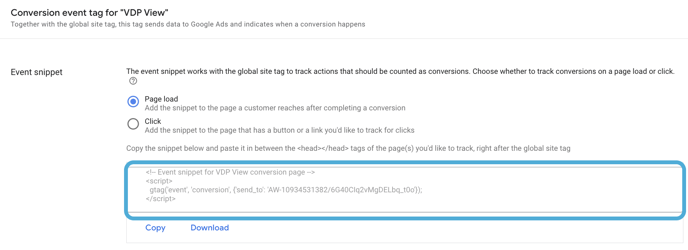
- Event Snippet
- Apply the event snippet to all VDP pages on your website

- Apply the event snippet to all VDP pages on your website
Copy the snippet below and paste it between the <head></head> tags of the VDP pages, right after the global site tag.
- Click done, and now your conversion tracking is set up!