Once you’ve successfully created your Company in Apple Business Connect, the next step is creating a Brand. This allows you to manage one or more locations under a specific brand identity, organize your business assets, and prepare for listing creation or claiming. Here's a complete walkthrough.
🔑 Prerequisites
Before you begin, make sure:
-
You’ve created your Company account in Apple Business Connect.
-
You’re using an Apple ID that is associated with your business (preferably a company-managed email, not a personal one).
-
You have the following business documentation ready:
-
U.S. Government-issued photo ID (driver’s license, passport, etc.)
-
Legal business name
-
Federal Tax ID Number (EIN) or equivalent business registration number
-
D-U-N-S Number (optional but sometimes requested during verification)
-
Website URL
-
Business phone number
-
Your role/title at the company
-
⚠️ Important Note
When creating a location in Apple Business Connect, the location name must exactly match the brand name you are associating it with. For example, if the brand registered is "Ford", then the location must also be named "Ford". You cannot name the location "Napleton Ford of Lakeshore" under the "Ford" brand, as Apple will reject the submission.
In this case, the correct process would be to create a separate brand called “Napleton Ford of Lakeshore” and then add the location under that brand. Following Apple’s naming requirements ensures your locations are approved without delay.
🚀 Step-by-Step: How to Create a Brand in Apple Business Connect
1. Log in to Apple Business Connect
-
Go to businessconnect.apple.com.
-
Sign in using your business Apple ID.

2. Access the Brands tab
-
Once signed in, you’ll be taken to your Company dashboard.
-
If you have Admin access, you’ll see a “Brands” tab, select it.

3. Click “Add”
-
Located at the top right in the “Brands” section.

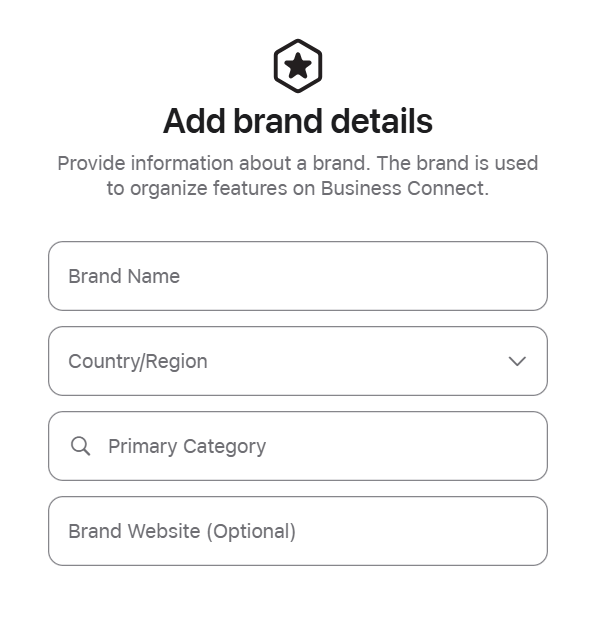
4. Enter Brand Information
You'll be prompted to enter the following:
a. Brand Name
-
This is the public-facing name (e.g., “Joe’s Coffee”).
-
Must match the signage and official branding of your business.
b. Brand Country or Region
-
The country where the brand is located. You can add the same brand to multiple countries later.
c. Business Category
-
Select the most accurate category for your brand (e.g., Retail, Restaurant, Automotive).
d. Brand Website
-
Required to verify ownership and provide business legitimacy.
-
Enter a valid and publicly accessible URL.
5. Enter Business Details for Verification
To verify your Company has ownership of this new Brand, Apple will request the following:
a. Government-Issued ID
-
A clear image of your ID (driver’s license, passport, or other official government ID).
-
This must match the person requesting the Brand and their role in the company.
b. Federal Tax ID Number
-
Enter your EIN (Employer Identification Number) or equivalent business registration number.
-
Used to confirm your company’s legal existence.
c. Your Role/Title
-
Must be someone with authority to act on behalf of the company (e.g., Owner, Marketing Director, Franchise Operator).
d. Optional: D-U-N-S Number
-
Especially helpful for larger companies or international brands.
-
You can find or request a D-U-N-S number at dnb.com.

6. Upload Supporting Documentation (if requested)
Apple may ask for:
-
Business utility bill or other proof of address
-
Articles of Incorporation
-
Business license
This depends on region, business type, and how your Company was initially verified.
7. Submit for Review
Once all fields are complete and documents uploaded:
-
Click “Send for Review.”
-
Apple will review your Brand creation request, usually within 2–5 business days.
-
You'll receive an email confirmation once it's approved.
✅ What Happens Next?
After your Brand is approved:
-
You’ll be able to add locations under this Brand.
-
Each location can be individually verified, customized, and managed.
-
You can assign team members to manage specific Brands or Locations via the Team tab
🛡️ Tips to Ensure a Smooth Brand Verification
-
Use accurate, consistent business information across your documents and your website.
-
Make sure your website is live and matches your Brand name.
-
Do not use a personal Apple ID, create a dedicated company Apple ID tied to your business email.
-
Double-check that all uploaded documents are legible, current, and in acceptable formats (PDF or JPG/PNG).